Installation Guide
Software Installation
Installation via Steam Client:
- Download and install the software.
- During the installation process, you may need to install some third-party runtime libraries. The installation takes a certain amount of time. Please wait patiently.
Start Software
- Click the Start button in the Steam client, or double-click the application icon on the desktop.
- The default character, pet, personality and voice will be used for the first startup.
- After startup, the currently used character will be displayed on the desktop.
Basic Operations
Function Button
-
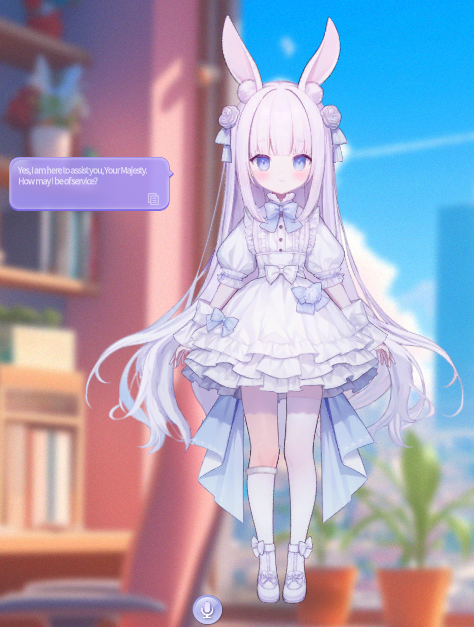
Move the mouse to the character to display the function button.
-
Drag the character model with the mouse to adjust the character position.
-
When the mouse is on the character model, slide the mouse wheel to adjust the size of the character model.
-
-
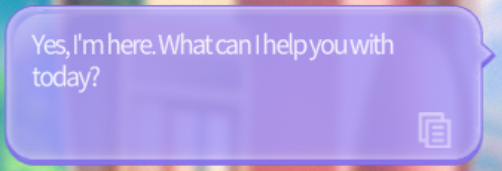 Character Reply Bubble
: Display the content of the character's reply to the user
-
 Reply Content Copy Button
: Click the button to copy the text content of the character's reply to
the clipboard
-
 Input Mode Switch Button
: Click to switch between text input and voice input mode.
- Default input status : When the software starts, the software will detect whether the microphone is connected normally.
- If the microphone is connected normally, it is voice input.
-
If the microphone is not connected normally or the microphone is not connected, it is text input.
-
Automatic state switching : When the software encounters the following situations during use, the software will automatically switch the input mode to facilitate user input
- When the microphone is connected normally and the input mode is voice input, unplug the microphone or the software cannot detect the microphone, and automatically switch to text input mode
- The microphone is connected normally, then say the character wake-up word to the microphone, the software automatically switches to voice input mode, and the character is awakened
-
Voice wake-up word : The character's wake-up word is the character's current name or nickname. Say the wake-up word to the microphone, and after the character replies, you can start a conversation.
-
Drag the character to hide : Drag the character model to the left and right edges of the screen (multiple screens are calculated according to the leftmost and most screen edges in the current screen layout) and release the mouse, the character will automatically hide along the edge.
-
Automatic character hiding : The "Hide" option in the right-click menu (both the character model and the tray) allows the character to automatically find the nearest screen edge to hide.
-
Drag the character to show : Move the mouse close to the position where the character is hidden, and the character will appear. At this time, drag the character model away from the edge of the screen, and then release the mouse, the character will leave the hidden state and appear on the desktop.
-
Automatic character display : After the character is hidden, the "Show" option in the right-click menu (tray menu only) can make the character leave the edge of the screen and appear.
-
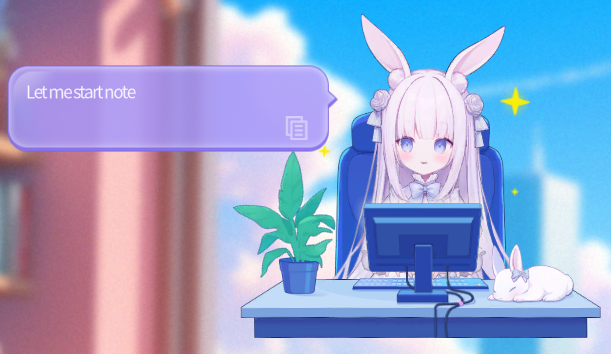
Open local software : Enter the keyword "open" + "software or file name" (text and voice content), and the character will successfully recognize the command. For example: "openNotepad", the software will start "Notepad"
-
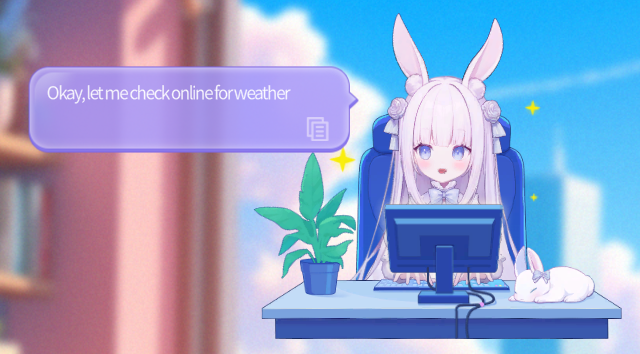
websearch : Enter the keyword "web search" + "search content" (text and voice content), and the character will successfully recognize the command. For example: "Web search for today's weather", the software will use the browser to open the search for "today's weather"
-
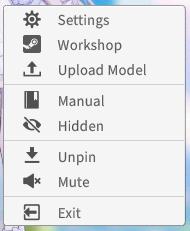
Right-click menu : Right-click the character model or tray icon with the mouse to open the right-click menu, the function options are as follows
-
Set : Open the setting interface of the software function panel.
-
Workshop : Directly open the Workshop interface of the software function panel.
-
Upload model : Directly open the upload model interface of the software function panel.
-
Instruction manual : Click to open the instruction manual page of the official website.
-
Hide : Click to open the automatic hiding of the character by clicking on the edge (only in the right-click menu of the model).
-
Put on top/unpin : Control the character hierarchy through one-click operation to achieve the effect of fixing on the top and unpinning (right-clicking the tray icon can make the character display on the top, which is convenient for finding the character when there are many windows.).
-
Mute/unmute : Control the volume of the character's voice through one-click operation to immediately turn off or restore the sound. (When muted, the character will still reply to the user's message)
-
Exit : Click to pop up the exit secondary confirmation box, click "Confirm" and the software will close.
-
Edge hiding
Voice command
Right-click menu
Character interaction
Through the interaction between the table pet character and the user, the software provides a more vivid and interesting user experience.
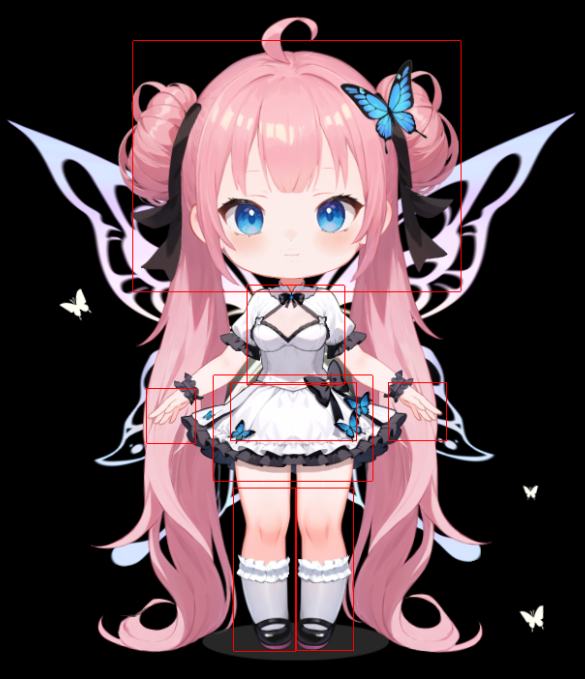
Clicking the model in the red box area in the figure below will trigger the interactive action of the character (all official characters)
Function panel
- The panel has the following pages: character, settings, Workshop and upload model. Click the corresponding page button to switch

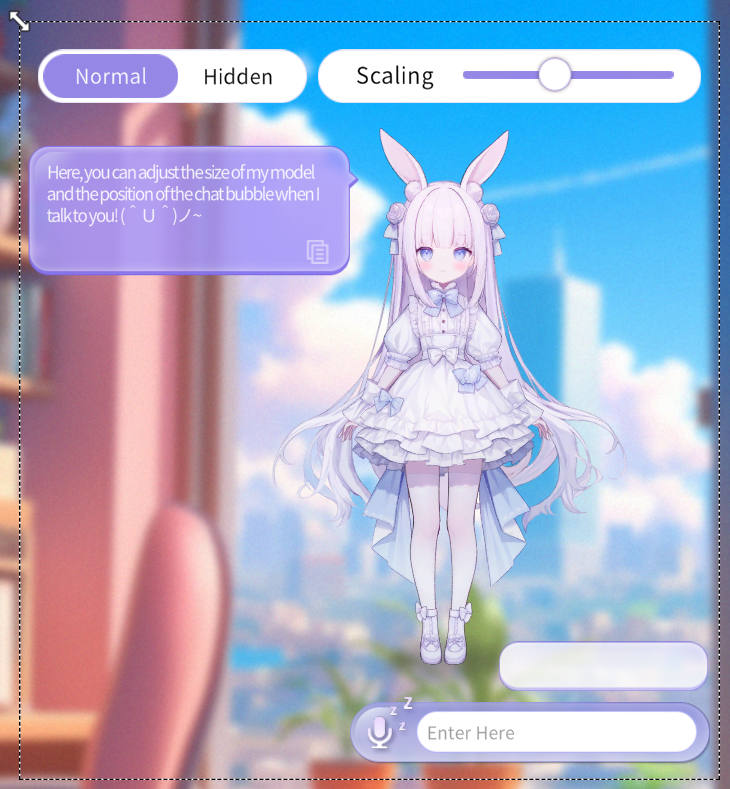
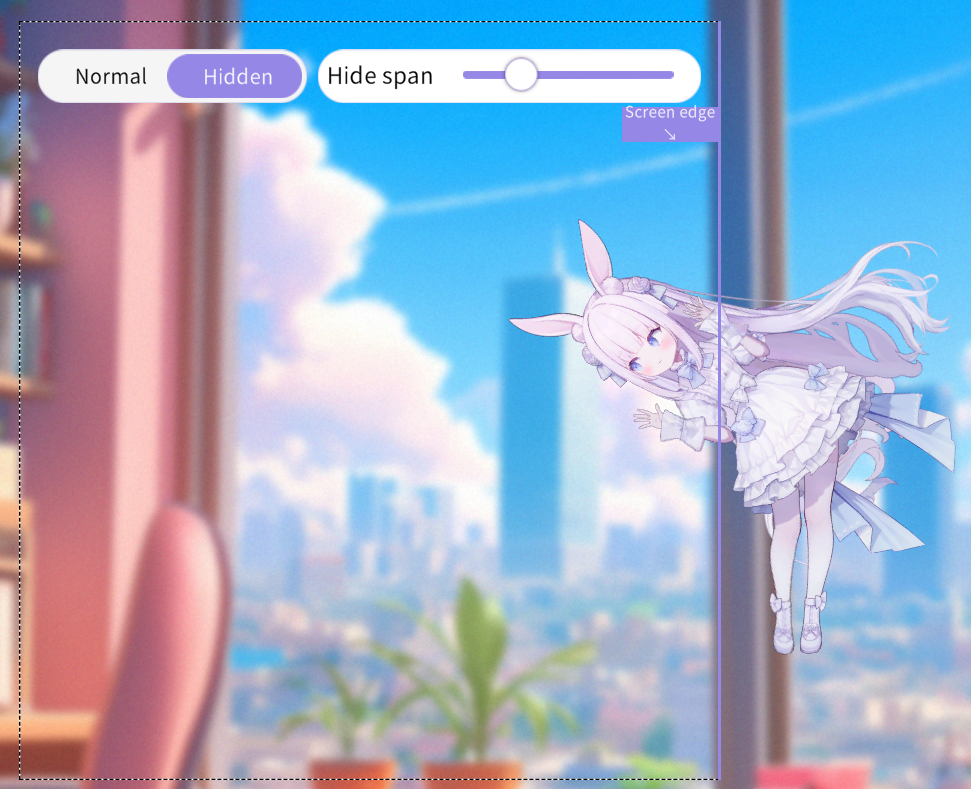
Layout mode
- In layout mode, you can adjust the two display states of the character, normal state and hidden state
- Normal mode : When the character is in the normal state, you can adjust the layout size (the size of the dotted area in the figure), the position of the character and UI controls (character speech bubbles and text input boxes) in the layout, and the model size of the character
Character page
- You can set the current image, voice and personality here.
- The page displays all the local resources that can be used.
- Users can customize the image, voice and personality of the character to combine the characters that meet their needs.
- After the image and voice resources are selected, the software will immediately apply the settings. After the character editing is completed, you need to click the "Apply" button on the interface to take effect.
- After the voice is selected, the character will immediately speak the corresponding audition sentence with the selected voice, which is convenient for players to find the right voice.

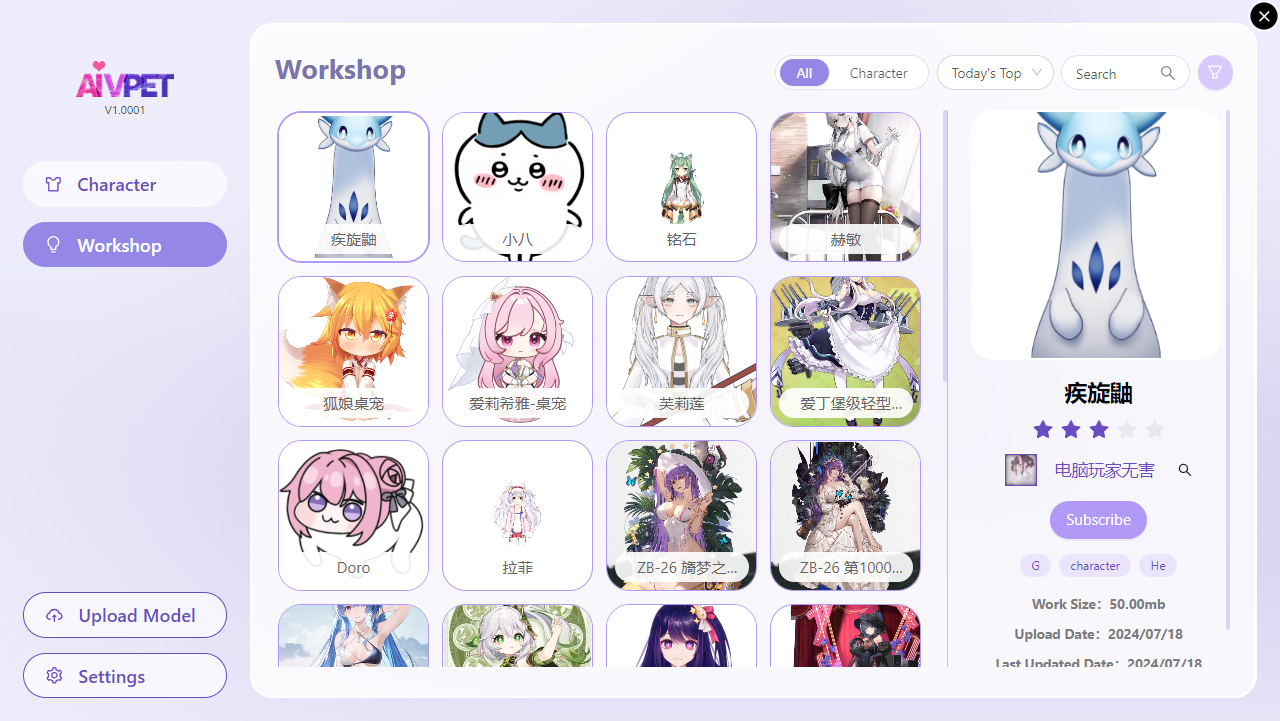
Workshop
- Show all the character models that can be subscribed in the current Steam Workshop.
- You can set conditions for filtering in the upper right corner of the interface.
Upload works
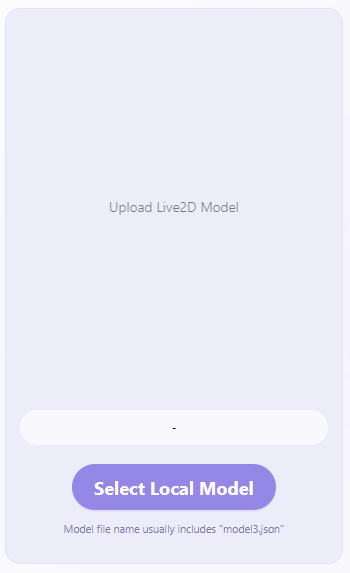
Click the Upload Model button to open the upload settings interface, where you can upload Live2D model resources to the steam Workshop.

1. Set the uploaded model file, resource cover image and default model skin on the left side of the interface.s
- Model resources are generally files in the model folder with the file name containing "model3.json" (for example: Nana_001.model3.json), which is the model file to be selected here.
2. In the middle of the interface, customize the binding of the model's actions and the predefined actions of the software, so that after the software applies the model, the model can play various actions normally.
- Click the drop-down box in the list to display all available actions of the current model. According to the action name on the left, select the appropriate model action for matching.
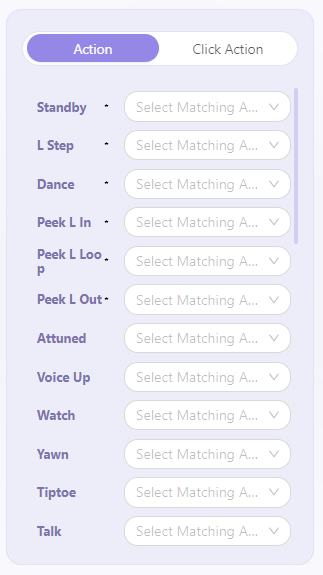
- The software has predefined the following actions as the basic actions of the character. After configuration, it can ensure that the character plays appropriate actions as operation feedback in the common functions of the software.
- The following action names have been pre-bound to the fixed actions and click areas on the model. Clicking the area will play the action with the corresponding name:
| Click action name | Description |
|---|---|
| Default standby | The looping action played when the character is in standby state. |
| Left step | The action of the character moving horizontally, played when the character enters the edge of the screen and hides |
| Dancing loop | The action of the character dancing in a loop. (In subsequent versions, the character will automatically dance when the computer plays music) |
| Enter left probe | The transition action of the character in the edge hidden state to the probe state. |
| Probe loop left | The action played by the character in the probe state in a loop. |
| Leave left probe | The transition action of the character in the probe state to the edge hidden state. |
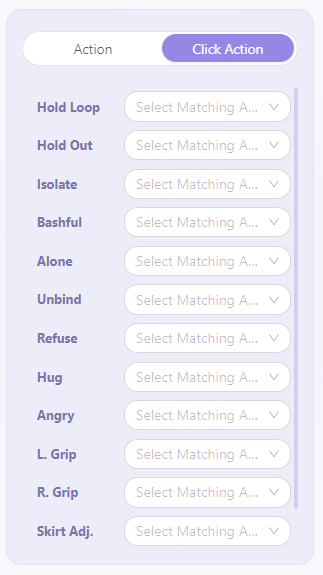
- The software has predefined the following areas as feedback actions for clicking different areas of the character. Users are required to associate the actions of the current model with the corresponding click areas so that the character has appropriate click feedback actions.
-
Unofficial Live2D models, please confirm whether there are click areas with the following names in the model before uploading. If not, the model will not respond to click actions after application.
-
To adjust the click area for the Live2D model, you need to use the Live2D editing tool (Live2D Cubism Editor) to process the model source file. The exported model file cannot be adjusted.

| Click area name | Description |
|---|---|
| HitAreaHead | Head click area |
| HitAreaUpperbody | Top click area |
| HitAreaLowerbody | Skirt click area |
| HitAreaLa | Left hand click area |
| HitAreaRa | Right hand click area |
| HitAreaskirt | Skirt hem click area |
| HitAreaLleg | Leg click area |
| HitAreaRleg | Leg click area |
Note: The click area can also adjust the location of the area and the bound action according to your needs (the click actions of the official characters are configured according to the area names above, hence the name)
3. The description and label settings of the uploaded work materials on the right side of the interface.
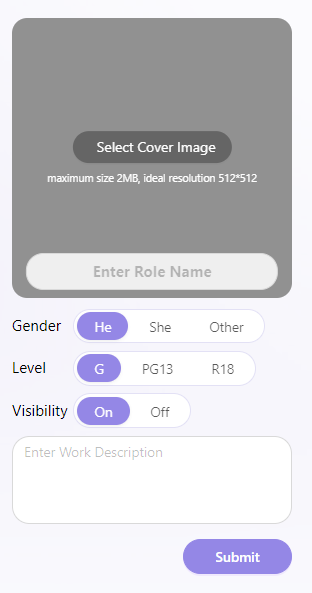
4
 After all content settings are completed, click the Submit button in the lower right corner of the interface to upload the work.
Upload confirmation
- SAfter setting the model to be uploaded, click the Upload button on the interface to upload the resource.
- After clicking the button, the interface will prompt "Uploading", and after the upload is completed, it will prompt "Upload Successful".
- After the upload is successful, check it in the software's Workshop interface and steam's Workshop interface.

Set
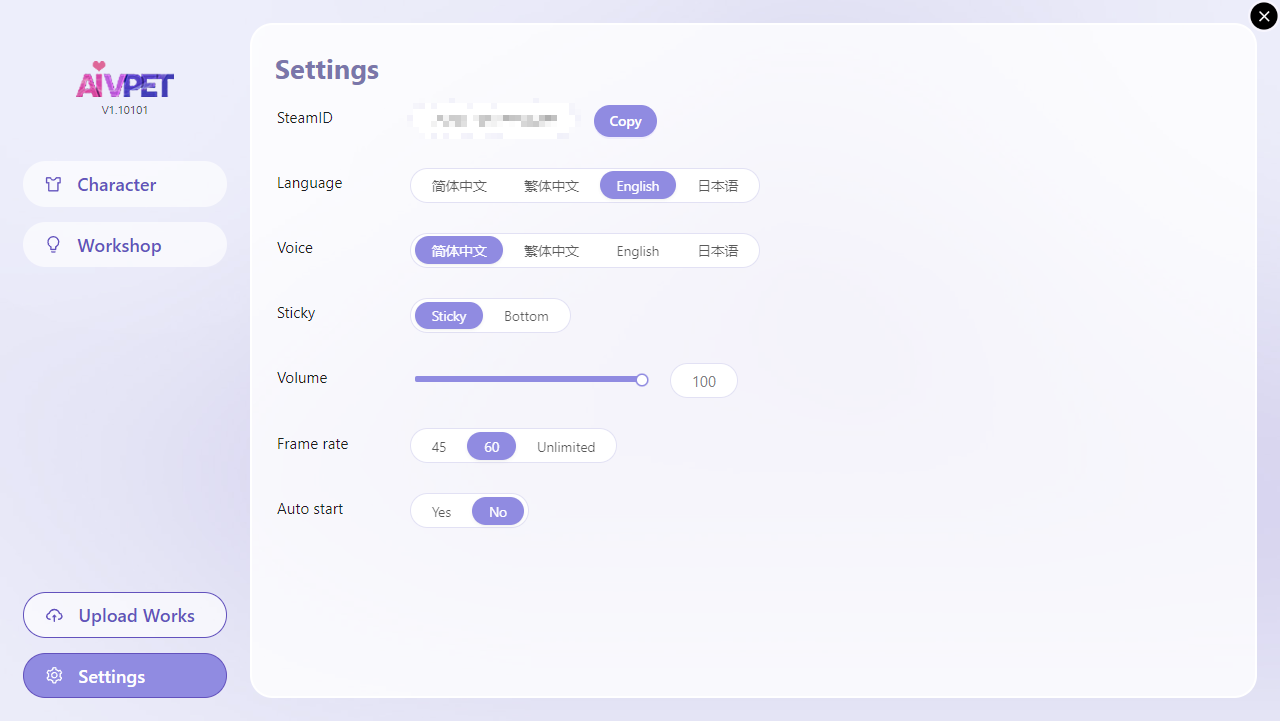
Various settings of the software.
